
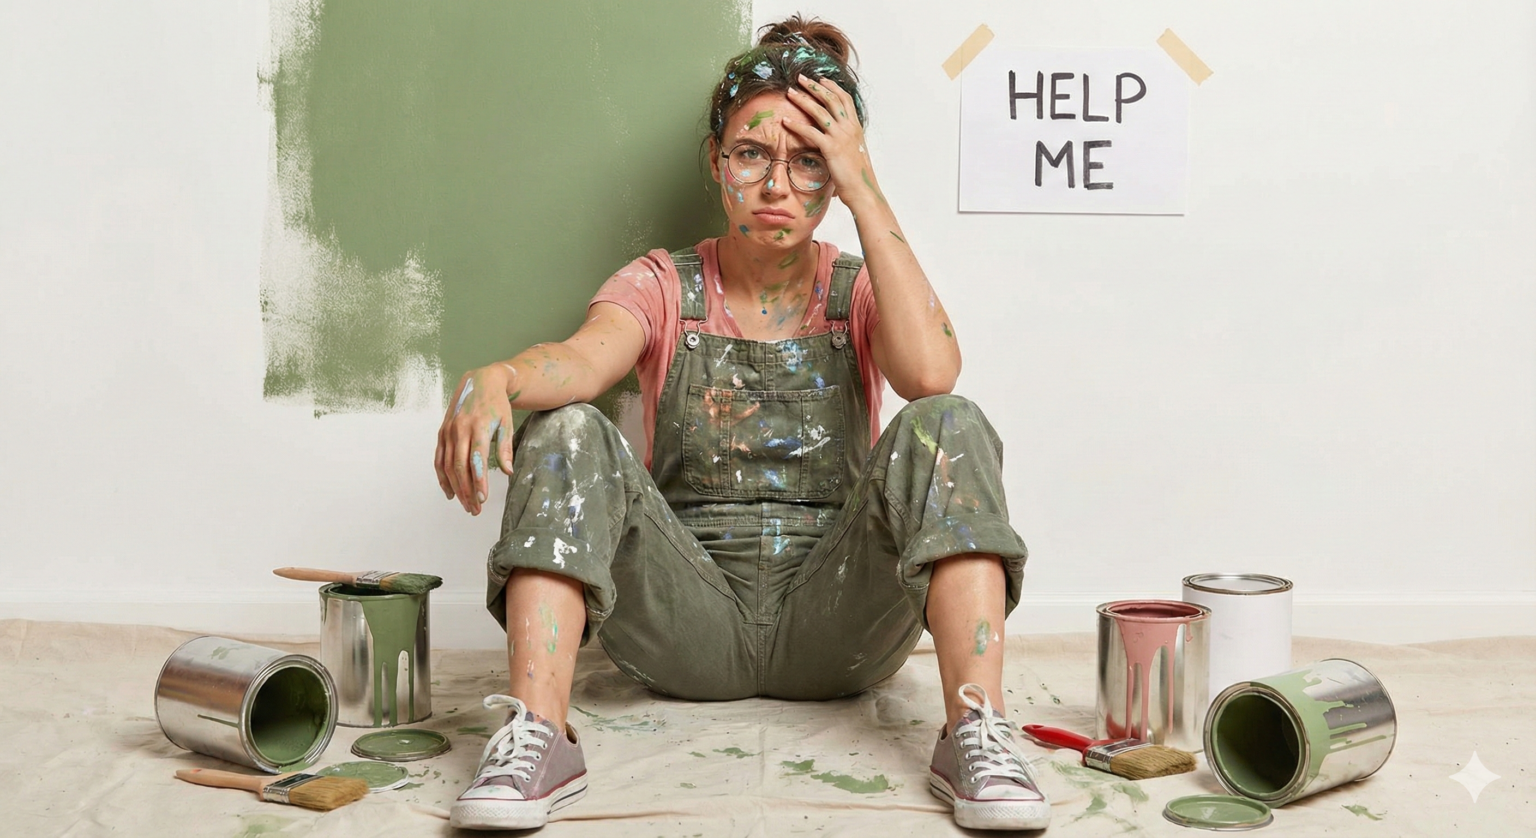
5 Costly Painting Mistakes Every Homeowner Makes
(And How to Avoid Them)
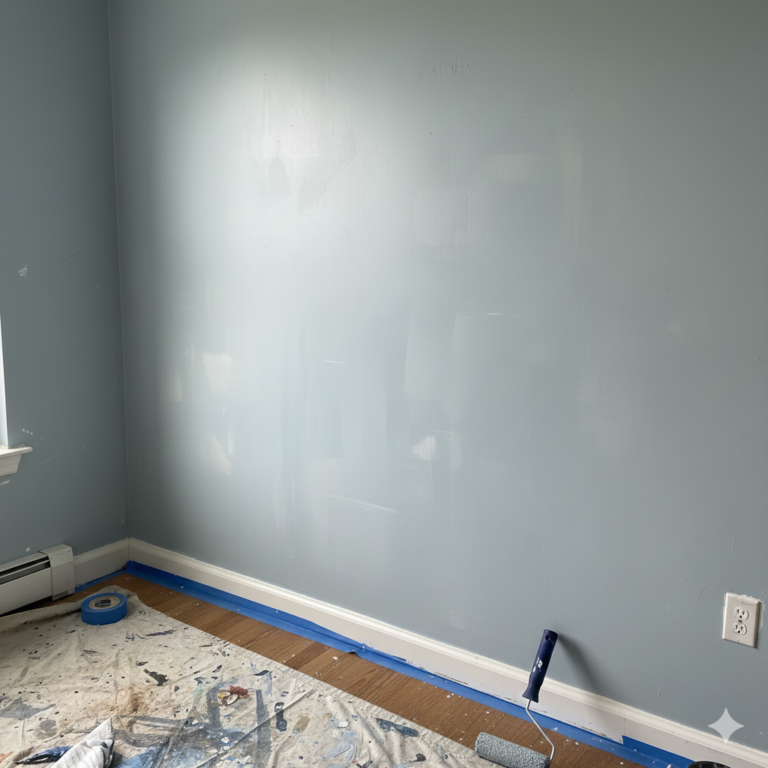
Essential Wall Preparation Before Painting
Mistake #1: Neglecting Proper Surface Preparation
One of the most common and costly mistakes in interior painting is inadequate surface preparation. When homeowners are eager to see their freshly painted walls, there’s a strong temptation to apply paint directly over existing surfaces without proper preparation. However, this approach virtually guarantees disappointing results and premature paint failure.
Why Surface Preparation Matters
Paint needs a clean, slightly textured surface to form a proper mechanical bond. When you apply new paint over walls contaminated with grease, dust, dirt, or other residues, these substances create a barrier between the paint and the wall surface. The paint essentially adheres to the contaminants rather than the wall itself, resulting in poor adhesion, premature peeling, flaking, and chipping—sometimes within just months of application.
Glossy or semi-gloss surfaces present additional challenges. These smooth finishes lack the surface texture (often called “tooth” in painting terminology) necessary for new paint to grip effectively. Without proper preparation, paint applied over glossy surfaces may initially appear acceptable but will often begin lifting, especially in high-traffic areas or where the surface experiences any moisture exposure.
The Proper Preparation Process
Cleaning: Begin by thoroughly cleaning all wall surfaces using a trisodium phosphate (TSP) solution or a suitable degreaser formulated for pre-paint cleaning. TSP is particularly effective at cutting through kitchen grease, hand oils, and accumulated grime. Mix according to package directions, apply with a sponge or cloth, and work from bottom to top to prevent streaking. Rinse thoroughly with clean water and allow walls to dry completely—typically 24 hours—before proceeding.
For those concerned about TSP’s environmental impact or working in areas where it’s restricted, substitute cleaners containing sodium metasilicate or use a solution of dish soap and water, though these may require more elbow grease for heavily soiled surfaces.
Sanding: Any glossy or semi-gloss painted surfaces must be dulled through light sanding. Use 120 to 150-grit sandpaper and sand just enough to remove the sheen and create a slightly rough texture. You don’t need to remove the old paint entirely—just scuff the surface. After sanding, wipe down walls with a tack cloth or damp rag to remove all dust particles.
Repairing Damage: Inspect walls carefully for nail holes, dents, cracks, and other imperfections. Use spackling compound for small holes and lightweight joint compound for larger repairs. Apply with a putty knife, slightly overfilling the damaged area. Once dry—usually within 30 minutes to 2 hours depending on depth—sand the repair smooth and flush with the surrounding wall using fine-grit sandpaper. Large cracks may require multiple applications. Remove sanding dust completely before painting.
Time Investment Pays Off
While thorough surface preparation may add several hours or even a full day to your painting project, this investment pays dividends in paint longevity, appearance, and overall satisfaction. Professional painters typically spend more time on preparation than actual painting—a practice that ensures results lasting for years rather than months.
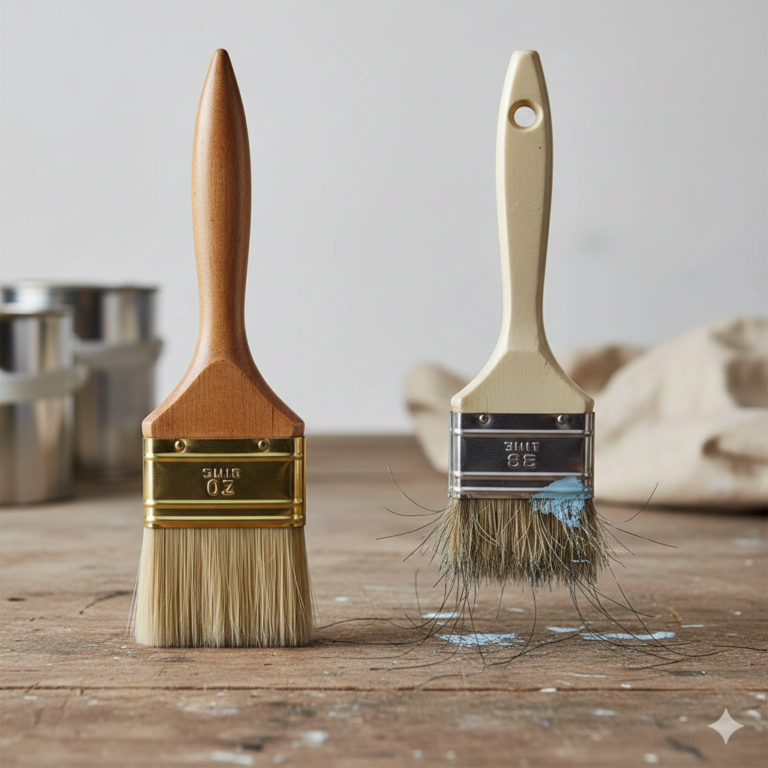
Mistake #2: Using Low-Quality Tools and Painting Equipment
The temptation to purchase inexpensive painting tools is understandable when facing a home improvement budget, but this economy almost always proves false. Budget brushes and roller covers are manufactured with inferior materials that fundamentally compromise your painting results, regardless of your technique or the quality of paint you’re using.
The Problems with Low-Quality Tools
Cheap Brushes: Inexpensive brushes typically feature synthetic bristles that are poorly secured in the ferrule (the metal band holding the bristles). During use, these bristles shed continuously, embedding themselves in your wet paint. Even a few stray bristles create visible defects that require sanding and touch-up once the paint dries. Additionally, low-quality brushes hold less paint, requiring more frequent dipping and creating uneven coverage with visible brush marks. The bristles often lack proper flagging (split ends) and tapering, which professional brushes use to hold paint and create smooth release.
Poor Roller Covers: Bargain roller covers present similar issues. Those exceptionally soft, fluffy covers that feel pleasant to touch are often made from loosely bonded fibers that shed lint throughout application. This lint becomes permanently embedded in your paint film, creating a rough, textured surface that resembles fine sandpaper rather than a smooth finish. Low-quality roller covers also tend to mat down quickly, reducing their paint-holding capacity and creating uneven application patterns including thin spots and roller marks.
Selecting Professional-Grade Tools
Quality Brushes: Invest in brushes appropriate to your paint type. For water-based latex paints, choose brushes with high-quality synthetic bristles made from nylon, polyester, or a nylon-polyester blend. These materials resist water absorption that would cause bristles to splay and lose shape. For oil-based paints, natural bristle brushes made from animal hair (typically ox or boar) perform best. Look for brushes with flagged and tapered bristles, which hold more paint and provide smoother application. A good 2 to 2.5-inch angled sash brush is essential for “cutting in” along ceilings, corners, and trim, allowing precise control and clean lines.
Professional Roller Covers: Select woven roller covers rather than those with loose, fluffy fibers. Microfiber roller covers represent an excellent choice, offering lint-free application and superior paint pickup. The nap length (thickness of the roller cover) should match your surface texture: use 3/16 to 1/4-inch nap for smooth surfaces like properly finished drywall, 3/8 to 1/2-inch for lightly textured walls, and 3/4-inch or longer for rough surfaces like textured ceilings or stucco. Quality roller covers can be thoroughly cleaned and reused multiple times, making their higher initial cost more economical over time.
Additional Essential Tools: Don’t overlook the roller frame itself—cheap frames bend under pressure, causing uneven application. Choose a sturdy metal frame with a comfortable handle and threaded end for extension pole attachment. Quality paint trays or roller buckets with liners make cleanup easier and paint application more efficient.
Long-Term Value
While professional-grade brushes might cost $15 to $30 and quality roller covers $8 to $15 each compared to budget alternatives at $2 to $5, the investment pays for itself through superior results, time saved on corrections, reduced paint waste, and reusability. Most professional painters use the same high-quality brushes for years, properly cleaning and storing them after each use.
Mistake #4: Painting in Inadequate Lighting Conditions
Proper lighting during painting is frequently overlooked, yet it represents one of the most critical factors separating professional-looking results from amateur work. Many homeowners attempt to paint in rooms lit only by existing fixtures or natural daylight, unaware that these standard lighting conditions conceal defects that become glaringly obvious once the paint dries and the room returns to normal use.
Why Lighting Quality Matters
The human eye’s ability to detect subtle variations in paint coverage, texture, and finish depends entirely on lighting angle and intensity. Under typical room lighting from ceiling fixtures or windows, wet paint appears uniform and smooth. However, these light sources shine relatively perpendicular to wall surfaces, failing to reveal the imperfections that will become visible under different lighting conditions.
Hidden Defects: Poor lighting conditions mask numerous painting errors including missed spots where the old color shows through, uneven coverage creating variations in color intensity or sheen, drips and runs that appear as raised lines once dried, roller stipple (the orange-peel texture from improper roller technique), brush marks and lap marks where wet and dry paint meet, and thin areas that will require additional coats. These defects often go unnoticed until the paint has dried completely, at which point correcting them requires additional sanding and recoating—far more work than catching and correcting them during initial application.
The Cut-In Challenge: Cutting in—painting the edges along ceilings, corners, trim, and baseboards with a brush before rolling the main wall areas—presents particular challenges under poor lighting. The precise hand control required to create clean, straight lines becomes nearly impossible when you cannot clearly see where your brush is depositing paint. Inadequate lighting leads to wobbly, wavy cut-in lines, paint accidentally applied onto ceilings or trim, gaps between the cut-in area and rolled sections, and inconsistent line width that becomes obvious under proper lighting.
Implementing Professional Lighting Techniques
Raking Light Setup: Professional painters employ a technique called raking light, which involves positioning light sources to shine across the wall surface at an acute angle rather than perpendicular to it. This creates shadows that dramatically highlight any surface irregularities, wet paint inconsistencies, or application errors. To implement raking light, position a portable work light (500 to 1000 watts or LED equivalent) on a tripod or stand at one end of the wall section you’re painting, aimed to shine across the wall surface at approximately a 15 to 30-degree angle. The light should be positioned at roughly the same height as the center of the area being painted.
As you work, the raking light will immediately reveal any missed spots as darker areas where the old paint color shows through, thin coverage appearing as subtle color variations, drips and sags casting small shadows as the paint flows, and uneven roller application creating a stippled pattern. This instant feedback allows you to correct issues immediately while the paint remains wet and workable, rather than discovering them after drying when correction becomes far more difficult.
Multiple Light Source Strategy: For larger rooms or comprehensive projects, use multiple work lights. Position one light for raking illumination across the wall being painted, and place additional lights to provide general illumination of the work area and adjacent walls. This prevents you from working in your own shadow and provides comprehensive visibility of the entire room.
Work Light Selection: Choose portable work lights specifically designed for construction and painting work. LED work lights offer several advantages including bright, cool illumination that doesn’t generate excessive heat, lower power consumption allowing multiple lights on a single circuit, and durability to withstand jobsite conditions. Many professional-grade LED work lights now incorporate adjustable color temperature settings, allowing you to match the light quality to your room’s normal lighting conditions for the most accurate color assessment.
Optimal Painting Sequence: When possible, paint during daylight hours while also using artificial work lights. Natural daylight through windows provides excellent color rendition for assessing your chosen paint color, while the work lights provide the raking illumination necessary to spot application defects. However, avoid painting in direct sunlight streaming through windows, as this can cause paint to dry too quickly and create lap marks.
Post-Application Inspection: After completing each wall section but while paint remains wet, perform a systematic inspection using your raking light. Move the light slowly across the entire surface from multiple angles, watching for any areas that need additional coverage or smoothing. This final check, performed while the paint can still be worked, prevents the disappointment of discovering defects after drying.
Equipment Investment
Quality portable work lights cost between $30 to $150 depending on brightness, features, and brand. This modest investment pays for itself immediately by preventing the need to repaint sections due to missed defects. Many lights include stands or tripods, but even a basic clip-on work light properly positioned can dramatically improve your ability to paint accurately.
Professional painters consider proper lighting as fundamental as quality brushes and rollers—not an optional nicety but an essential tool that directly impacts result quality. The ability to see exactly what you’re doing as you work represents the difference between guesswork and precision in paint application.
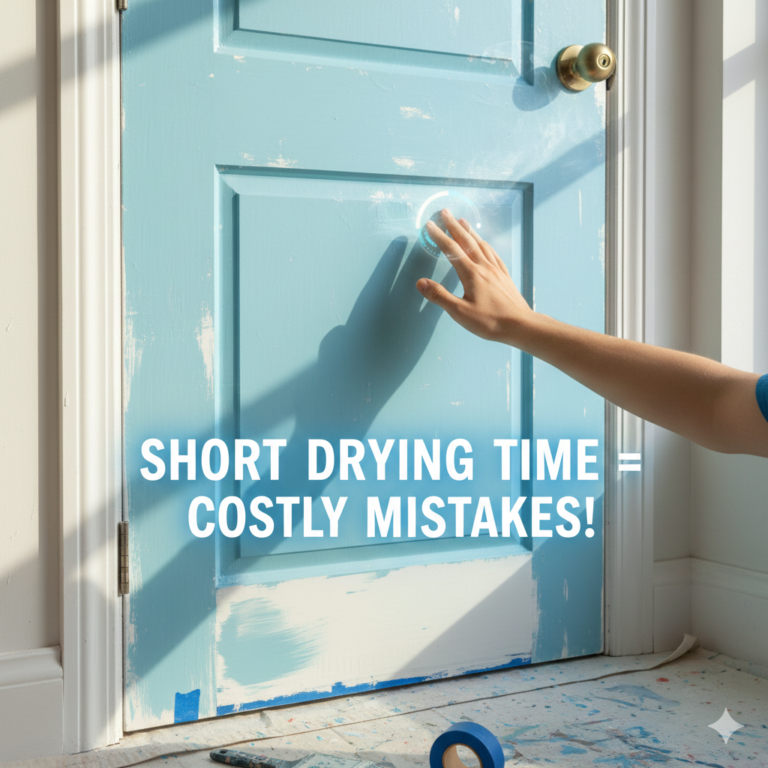
Mistake #5: Insufficient Drying Time Between Coats
The eagerness to complete a painting project quickly leads many homeowners to apply subsequent coats before previous layers have adequately dried. This seemingly time-saving shortcut represents one of the most destructive mistakes in interior painting, capable of completely ruining what would otherwise be quality work. The consequences of premature recoating extend far beyond minor cosmetic issues, potentially necessitating complete removal and restart of the entire project.
Understanding Paint Drying and Curing
Paint undergoes two distinct processes after application: drying and curing. Understanding the difference proves essential for achieving professional results.
Drying refers to the evaporation of solvents (water in latex paints, mineral spirits in oil-based paints) from the paint film. During this phase, the paint transitions from liquid to solid as the carrier evaporates, leaving behind the pigments and binders. A paint that is “dry to the touch” has completed only the initial surface drying—the topmost layer feels solid, but substantial solvent remains deeper in the paint film, continuing to evaporate.
Curing represents the chemical process where binders in the paint fully cross-link and harden, achieving maximum adhesion, durability, and resistance to damage. Latex paints typically require 14 to 30 days for complete curing, though they become dry enough for recoating far sooner. Oil-based paints cure through oxidation, a slower process that can extend for weeks or even months depending on temperature, humidity, and paint thickness.
The distinction matters because paint that is dry to the touch remains vulnerable and workable—applying a new coat over insufficiently dried paint disrupts the drying process and damages the existing layer.
Consequences of Premature Recoating
Physical Damage to Previous Coats: When fresh paint is rolled or brushed over a coat that remains tacky or hasn’t achieved sufficient dryness, the mechanical action of application tools physically disturbs the underlying layer. Roller covers and brushes can pull up the soft paint underneath, creating what painters call “lifting” or “wrinkling.” This manifests as a gummy, uneven texture where the two layers blend together improperly, waves or wrinkles in the paint film that cannot be smoothed out, and areas where paint bunches up or pulls away from the surface entirely. Once this damage occurs, the only remedy involves allowing complete drying, sanding the entire surface smooth, and starting over—far more work than simply waiting would have required.
Solvent Entrapment: When a new paint layer seals over paint that hasn’t fully dried, solvents become trapped beneath the surface. These solvents must escape for proper curing, but the new layer blocks their path. The trapped solvents create bubbling or blistering as they force their way through the upper layer, a soft, sticky finish that may never fully harden, extended drying times as solvents slowly migrate through multiple layers, and potential adhesion failure where the paint eventually separates from the wall.
Color and Coverage Issues: Applying paint over insufficiently dried previous coats leads to numerous appearance problems including streaking where the roller or brush drags wet paint from below, uneven color intensity as areas of different thickness dry at different rates, poor coverage where the mechanical disturbance creates thin spots, and surface imperfections that become permanently locked into the finish. These defects often don’t become fully apparent until the paint has dried completely, at which point significant corrective work becomes necessary.
Compromised Durability: Paint applied over wet or tacky previous coats never achieves its intended durability. The improper bonding between layers creates a finish that is more susceptible to chipping and peeling, easier to damage through normal wear, and more vulnerable to moisture penetration and staining. What should be a durable finish lasting years may begin showing wear and failure within months.
Proper Drying Time Guidelines
Reading Manufacturer Specifications: Every paint can includes recoat time specifications on the label, typically expressed as “recoat after X hours.” This represents the minimum time you should wait under ideal conditions (70-75°F, 50% relative humidity). However, this minimum should be considered a starting point rather than a guarantee. Latex paints typically specify 2 to 4 hours between coats, oil-based paints generally require 6 to 8 hours minimum, and primers may allow faster recoating, often 1 to 2 hours, though this varies by type.
Environmental Factors: Actual drying times vary significantly based on environmental conditions. Temperature dramatically affects drying speed—paint applied in rooms below 50°F may take several times longer to dry than the label suggests, while temperatures above 85°F can cause paint to dry too quickly, potentially creating other problems. Humidity plays an equally critical role. High humidity (above 70%) significantly extends drying time as moisture in the air slows solvent evaporation. In humid conditions, double the manufacturer’s recommended recoat time. Low humidity (below 30%) accelerates drying but can sometimes cause paint to dry too quickly at the surface while remaining wet underneath.
Ventilation and air movement promote faster drying by carrying away evaporating solvents, but avoid creating drafts so strong they cause rapid surface drying that traps moisture underneath. Film thickness also impacts drying time—thicker applications take proportionally longer to dry, which is one reason proper application technique matters.
The Touch Test: Before applying additional coats, physically verify that previous coats have dried sufficiently. Press your hand gently against the painted surface in an inconspicuous area. Properly dried paint should feel completely dry and slightly warm or at room temperature—if it feels cool to the touch, evaporation is still occurring, and the paint needs more time. The surface should show no tackiness whatsoever. If paint feels sticky or your hand adheres slightly, additional drying time is essential. The paint should feel firm and resistant to light pressure rather than soft or giving.
Conservative Timing Approach: When in doubt, wait longer. Professional painters often add a safety margin to manufacturer recommendations, especially in less-than-ideal conditions. A general rule: if the specified recoat time is 2-4 hours, wait the full 4 hours minimum, and consider extending to 6 hours in cool or humid conditions. For critical projects or challenging environmental conditions, waiting overnight between coats eliminates virtually all risk of premature recoating damage.
Optimizing Drying Conditions
Temperature Control: Maintain room temperature between 70-75°F during painting and drying. Use heating or cooling as necessary to keep conditions in this optimal range. Avoid painting in unheated spaces during cold weather or in areas without climate control during extreme heat.
Humidity Management: In humid climates or during humid weather, use dehumidifiers to reduce moisture levels in the painting area. Alternatively, air conditioning naturally reduces humidity while maintaining appropriate temperature. In very dry conditions, avoid excessive air movement that might cause too-rapid surface drying.
Air Circulation: Use fans to promote gentle air circulation—not aimed directly at wet paint, but positioned to move air through the room. This carries away evaporating solvents and promotes even drying across all surfaces.
Project Planning: Plan your painting project to accommodate proper drying times. If painting multiple rooms, work sequentially—complete all coats in one room before beginning another, allowing you to use drying time productively rather than feeling pressured to rush. For single-room projects, apply the first coat in the morning, allowing all day for drying before applying the second coat in late afternoon or evening, or plan to paint over two days with overnight drying between coats.
The Professional Perspective
Professional painters universally acknowledge that patience in allowing proper drying time represents one of the clearest distinctions between amateur and professional work. The time invested in waiting—typically just a few extra hours—prevents problems that would require days to correct. Quality painting involves as much waiting as working, and the results justify the patience required.
The Bottom Line
The Foundation of Professional Results
The distinction between amateur and professional-quality painting ultimately comes down to process rather than innate skill. Professional painters achieve superior results not through secret techniques or exceptional talent, but through disciplined adherence to proper procedures and unwavering respect for fundamental principles that govern paint application and adhesion.
The 80/20 Principle in Painting
Experienced professionals operate by a rule that surprises most homeowners: painting is approximately 80% preparation and only 20% actual paint application. This ratio reflects the reality that the quality of your preparation work directly determines the quality of your finished result far more than your brushwork or rolling technique.
Consider the mathematics of this principle. In a typical room painting project taking 12 hours total, professionals spend roughly 9-10 hours on preparation activities including cleaning walls, repairing damage, sanding, taping, priming, and setting up proper lighting and environmental controls. Only 2-3 hours involve actually applying paint to walls. Yet that small percentage of application time receives the full benefit of the preparation foundation, producing results that last for years without premature failure.
Conversely, when homeowners rush through or skip preparation steps to spend more time on application, they guarantee problems. No amount of careful brushwork can compensate for paint applied over greasy, dusty surfaces. The finest rolling technique cannot overcome the inadequate coverage resulting from skipped primer. Meticulous edge work means nothing if applied in poor lighting that conceals missed spots and defects.
Process Over Speed
Modern consumer culture emphasizes speed and efficiency, leading many homeowners to approach painting as a task to complete as quickly as possible. This mindset fundamentally contradicts the requirements for quality painting. Paint chemistry, material properties, and physical processes involved in creating durable, attractive finishes operate on their own timeline that cannot be rushed without consequence.
Adequate drying time between coats represents an immutable requirement governed by the laws of physics and chemistry—solvent evaporation and polymer cross-linking proceed at rates determined by temperature, humidity, and material composition, not by your project schedule. Surface preparation cannot be shortcut—adhesion depends on molecular-level bonding between paint and substrate that requires properly prepared surfaces. Proper application technique demands attention and care that become impossible when rushing.
The paradox that frustrates many DIY painters: rushing to finish quickly almost inevitably requires more total time than working methodically would have required. Premature recoating necessitates complete removal and restart. Inadequate preparation leads to premature failure requiring repainting within months instead of years. Poor tool choices result in defects requiring extensive correction. In every case, the time “saved” through shortcuts gets multiplied in corrective work.
Investment in Quality
Quality painting requires modest financial investment beyond basic paint costs, but this investment returns value many times over. Professional-grade brushes costing $20-30 deliver superior results and can be reused for years with proper care, while $2 brushes shed bristles and must be replaced after every use. Quality primer at $30-40 per gallon reduces topcoat requirements from four coats to two, actually saving money while improving results. A $50 work light prevents defects that would require hours of corrective work.
Beyond tools and materials, the investment includes time—time to properly clean and repair surfaces, time to allow adequate drying, time to work carefully and inspect results. This time investment separates professional results from amateur work far more than any other factor.
The Transformation Point
When homeowners commit to following proper procedures—thorough preparation, quality materials, appropriate lighting, adequate drying time—their results transform dramatically. The difference between work that obviously appears DIY and results that prompt questions about whether a professional was hired typically comes down to these fundamental practices rather than years of experience or exceptional skill.
First-time painters following proper procedures consistently achieve results superior to experienced homeowners who persistently skip steps or rush the process. The procedures work regardless of experience level because they address the underlying requirements for durable, attractive paint finishes.
Long-Term Perspective
Quality painting executed with proper preparation and procedure produces finishes lasting 7-10 years or more in typical interior conditions before requiring repainting. Rushed work with inadequate preparation often begins showing wear, peeling, or other failures within 1-3 years. Over the lifespan of homeownership, the difference between these timeframes compounds dramatically.
A room properly painted once per decade versus inadequately painted three or four times per decade represents not just the obvious difference in painting frequency, but also the cumulative time, cost, and disruption of repeated projects. The homeowner who invests proper time and attention in each painting project ultimately spends less total time painting, less money on materials, and experiences better-looking living spaces throughout the interval between paintings.
Final Thoughts
Your walls represent some of the largest visible surfaces in your home. The quality of their finish dramatically impacts the overall appearance and feel of your living spaces. Investing the time and attention to paint them properly—through thorough preparation, quality materials, proper technique, and adequate patience—transforms these surfaces from merely adequate to genuinely attractive.
Professional painters succeed not through innate talent but through disciplined adherence to proven procedures. These same procedures are available to any homeowner willing to slow down, invest in appropriate materials, and respect the process. The choice between obviously DIY results and professional-quality work lies not in hiring professionals but in following professional practices.
Your walls, your home’s appearance, and indeed your future self when you’re not repainting prematurely will appreciate the investment in doing the job properly. The satisfaction of looking at genuinely well-painted walls—smooth, even, durable, and attractive—far exceeds any temporary satisfaction gained from rushing to completion.